Step 14: Install pneumatic hood supports to facilitate the showing of under-the-hood. This replaces the stick previously used. I picked 30 pound strength supports and could have gone a little stronger. These will work anyway, they securely hold it in the up position and it is very easy to open and close the hood.
Sunday, December 9, 2012
Monday, December 3, 2012
ammeter
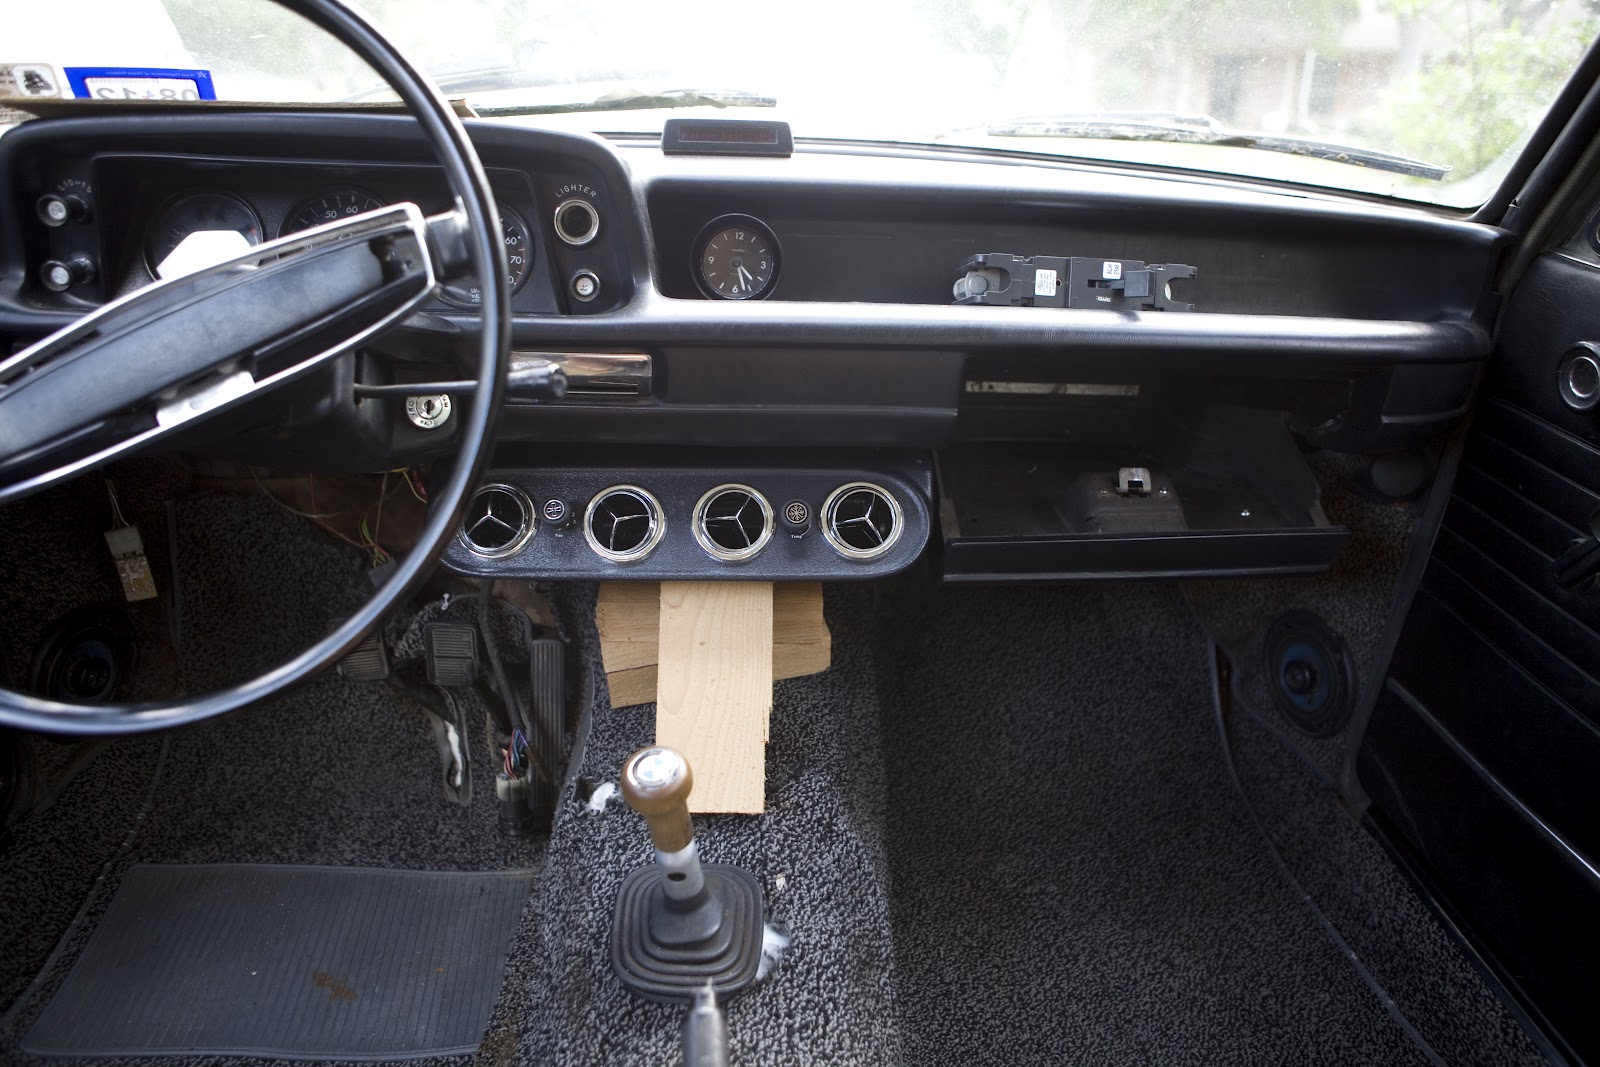
Step 13: Install ammeter. I decided to monitor battery current and motor current. I used romex wire because it has the potential to be at high voltage. Plus I had some laying around.

The meters fit where the old heater controls were.
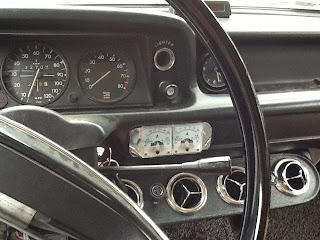
Through the firewall.

The shunt for the motor current hangs off the motor terminal. A cable will go from the other end of the shunt, under the car, into the trunk to the motor controller.


The meters fit where the old heater controls were.

Through the firewall.

The shunt for the motor current hangs off the motor terminal. A cable will go from the other end of the shunt, under the car, into the trunk to the motor controller.

The shunt for the battery current hangs off the battery stack contactor.


Sunday, September 9, 2012
battery disconnect switch / fans / contactor
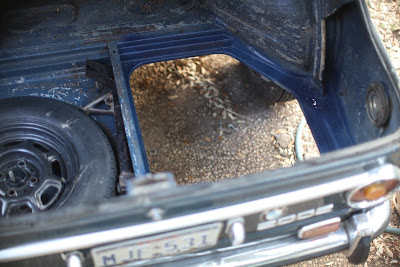
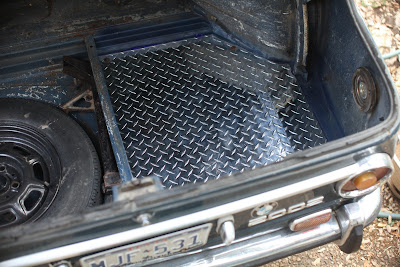
Step 10: Install battery disconnect switch. For this I'm using a huge breaker installed in the gas filler. It can be manually tripped by a power-take-off cable from the driver's seat. It is a standard with conversions to have a battery disconnect switch where the gas filler was for easy location by emergency crew. Typically I think this is just a kill-switch to the main contactor triggered by the gas filler flap and doubles up with a feature to prevent driving off while connected to a charger which is also commonly through the gas filler. It was a good spot for the breaker anyway.
Step 11: Wire up motor fan and condenser fan to switches in the dash. Something was wrong with the bearings in the condenser fan that came with the car, it didn't spin freely and it pulled excessive current. So I replaced it with an after-market fan that works great and only draws 4 amps. The 3rd switch is wired into the throttle circuit and will be used to make the motor idle when stopped for the air conditioning compressor to function.
Step 12: Install main contactor. This is a high power relay that will connect the battery to the motor controller. No picture for this but it sits in the engine bay and is wired to close with the key switch. You may hear it click in the video.
Sunday, August 12, 2012
throttle
Step 9: Rig throttle. Original throttle linkage, there's a spring on the wiper arm and a spring on the foot pedal.
Sunday, July 29, 2012
motor fan
Step 8: Install motor cooling fan. For this I chose a very cheap marine bilge blower. It's loud but will only be turned on when driving. I cut and bent a down spout from a rain gutter and riveted it onto the motor brush guard. The bilge blower fits snugly over and is screwed into the down spout.


compressor
Step 7: Install compressor. It will be serviceable from underneath, in case other components block access from top.


Adapter, mounting and compressor system engineered by Rebirth Auto in Florida. They'd done one before. Great fit!


Adapter, mounting and compressor system engineered by Rebirth Auto in Florida. They'd done one before. Great fit!
Saturday, July 28, 2012
motor is in
Most folks connect the transmission to the motor while it is out of the car. Clearly this was what the ring mounting system was designed for. I didn't want to mess with shift linkage so I left the transmission in the car. This might be doing it the hard way but it wasn't that hard. I removed the bottom half of the motor mount ring and installed it to put the motor on top of. The rig required some wrestling to mate up. I borrowed the hoist from a friend.


Sunday, July 22, 2012
ready to go in
Here is the motor assembled with the adapter. The ring around the middle will bolt to the old motor mount locations.


Thursday, July 5, 2012
motor adapter
Step 6: Install motor. Here is the motor to transmission adapter. There are tapped holes in the flange of a bearing. The holes line up with the flywheel. The bearing is pressed in to an aluminum spacer.
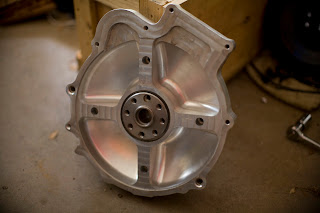
The motor will bolt to this side and the shaft will engage the bearing with a key.
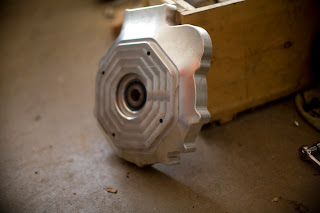
I attached the flywheel,


The motor will bolt to this side and the shaft will engage the bearing with a key.

I attached the flywheel,

and the clutch.

Sunday, May 20, 2012
mock battery
This block of wood is the same size and shape of the batteries I'll be using. A friend in the battery business has convinced me that LiFePO4 chemistry will more economical in the long run, and much more fun, than flooded lead-acid. Sealed lead-acid are even worse. I'll be using 30 cells of this size to start off with. Some will go under the hood and some will go in the trunk.


seats
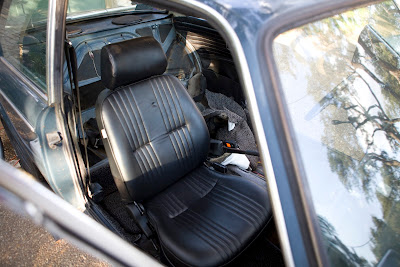
The 2002 did not come with seats. After a lot of scrounging junk yards & craigslist, the best solution presented itself as these after market seats with a vintage look. These also allowed for a narrow, close-to-the-center installation so that the steering wheel will be closely centered with the seat. 2002's came with stumps built into the floor that the seats sat on, first these were ground out so the new seats would not be too high. The seat will bolt to this frame which is bolted to the floor with grade 8 bolts and large washers underneath made of steel. The weak link is pulling a 6sq" washer through the floor.


Tuesday, May 15, 2012
conditioning the brushes
Step 5: Prepare motor. I'm letting the motor spin on 12V to condition the brushes before use.


Sunday, May 13, 2012
transmission
Here is where the electric motor will connect.

The AC compressor will run off the tail shaft.


The AC compressor will run off the tail shaft.

Wednesday, May 9, 2012
console constraints
I'm going to use this under-dash evaporator unit with vents, it fits nicely, held in place with blocks for a picture. The space under it will be filled with an electric heater, gauges and/or free space.

And the glove box still opens. Win!


And the glove box still opens. Win!
Sunday, May 6, 2012
carpet
Step 4: Pull carpet out and secretly put it through washing machine, get to know what's under there.


 |
| helper |
Monday, April 30, 2012
patch it up
Step 3: Patch all the holes that shouldn't be there, like where the gas tank was and where the heater core went through the firewall. I'll be installing a space heater, modifying it with a 12VDC fan, the heater coils will run off DC - the big battery.
.JPG)
.JPG)
.JPG)
.JPG)
Saturday, April 28, 2012
where the engine was
There's a big hole where the engine was. The condenser is from the PO who was installing AC.


Thursday, April 19, 2012
1972 BMW 2002
Step 1: Wash car and take pictures before it dries.

Step 2: Remove gas 'stuff', this all came out on a Sunday
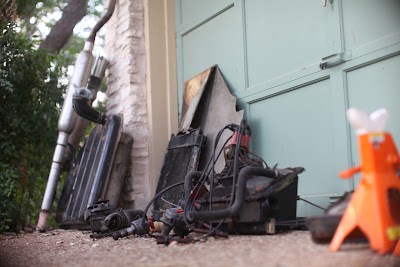

Step 2: Remove gas 'stuff', this all came out on a Sunday
including the engine.
I drove the car on gas-power for about half a year. It didn't come with seats so I temporarily transplanted the ones from my '99 Accord into it. They worked (including rigged up electronic adjustment), but were not ideal. The car was awesome but smelly. The emission controls had long been removed and I think the gas tank ventilation system was broke - it always smelled like gas. And smellin' like raw gas. But I worked the brakes out and replaced a bent rim, so not to have to mess with later.
I drove the car on gas-power for about half a year. It didn't come with seats so I temporarily transplanted the ones from my '99 Accord into it. They worked (including rigged up electronic adjustment), but were not ideal. The car was awesome but smelly. The emission controls had long been removed and I think the gas tank ventilation system was broke - it always smelled like gas. And smellin' like raw gas. But I worked the brakes out and replaced a bent rim, so not to have to mess with later.

Subscribe to:
Posts (Atom)